 Save
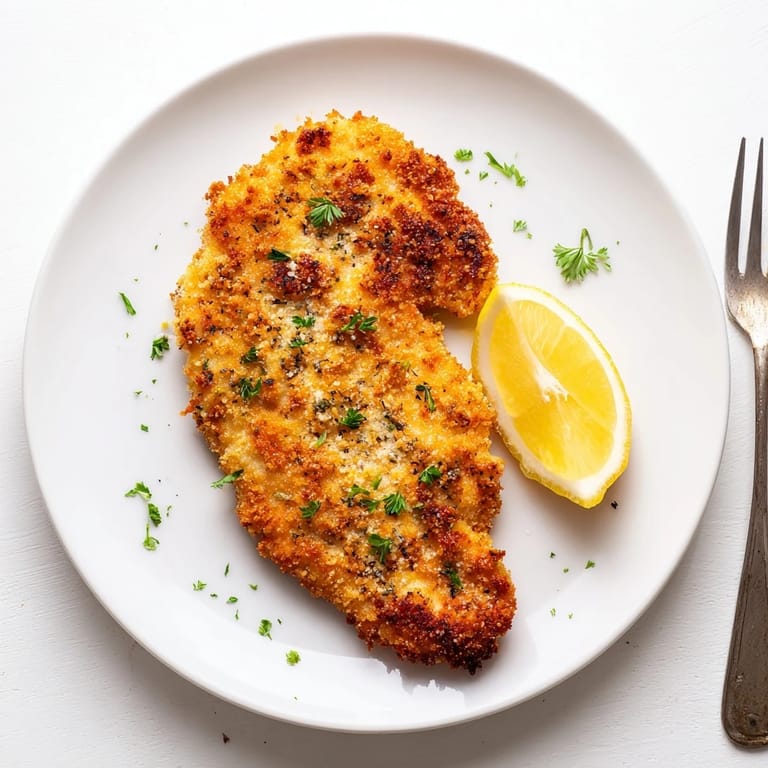
Save The kitchen windows were fogged up on a rainy Tuesday when I first tackled these crispy Parmesan chicken cutlets. With the gentle rhythm of my meat mallet thumping against the cutting board, I transformed ordinary chicken breasts into something extraordinary. The sizzle as each cutlet hit the hot oil filled my apartment with a scent so inviting that my neighbor actually texted to ask what I was cooking. That perfect golden crust – crackling and savory – made me realize some dishes don't need fancy techniques to feel like a celebration.
Last summer when my sister visited with her kids, I made these cutlets and sliced them into strips for the little ones to dip in marinara. My normally picky five-year-old niece not only cleaned her plate but asked if she could help next time. We stood side by side at the counter, her tiny hands carefully sprinkling cheese into the breadcrumbs while we talked about her first week of kindergarten. Sometimes the simplest foods create the strongest connections.
Ingredients
- Boneless skinless chicken breasts: Starting with evenly-sized breasts around 150g each helps them cook uniformly, and I've found organic chicken tends to be more tender and juicy for this particular preparation.
- Panko breadcrumbs: After experimenting with various breadcrumbs, Japanese panko creates that distinctively light, airy crunch that makes this dish special - regular breadcrumbs just don't achieve the same texture.
- Parmesan cheese: Freshly grated Parmesan rather than pre-packaged provides sharper flavor and melts beautifully into the crust, creating those delicious crispy cheese bits around the edges.
- Eggs and milk: This combination creates the perfect binding agent - the splash of milk makes the egg wash slightly thinner and easier to work with while still adhering perfectly to the flour-dusted chicken.
- Herbs and seasonings: The combination of garlic powder and oregano brings classic Italian warmth without overwhelming the delicate flavor of the Parmesan.
Tired of Takeout? 🥡
Get 10 meals you can make faster than delivery arrives. Seriously.
One email. No spam. Unsubscribe anytime.
Instructions
- Prep your chicken:
- Place each chicken breast between plastic wrap and pound them to about half-inch thickness, watching them transform from uneven chunks to beautiful, even cutlets. The plastic wrap prevents chicken bits from flying around your kitchen - a lesson I learned the messy way.
- Set up your dredging station:
- Arrange three shallow bowls in a row - flour in the first, beaten eggs with milk in the second, and the panko-Parmesan mixture in the third. This assembly line approach makes the process flow smoothly, keeping one hand dry and one wet to prevent the dreaded breaded fingers.
- Coat with precision:
- Dredge each cutlet in flour, ensuring a light, even coating before shaking off excess. The egg wash should thoroughly coat each piece, allowing the Parmesan-panko mixture to adhere generously when pressed firmly onto both sides.
- Master the fry:
- Heat your oil until it shimmers slightly, then carefully lay each cutlet away from you to prevent splatter burns. Listen for that satisfying sizzle that tells you the temperature is perfect - not smoking, but active enough to create that golden crust within 3-4 minutes per side.
- Rest and serve:
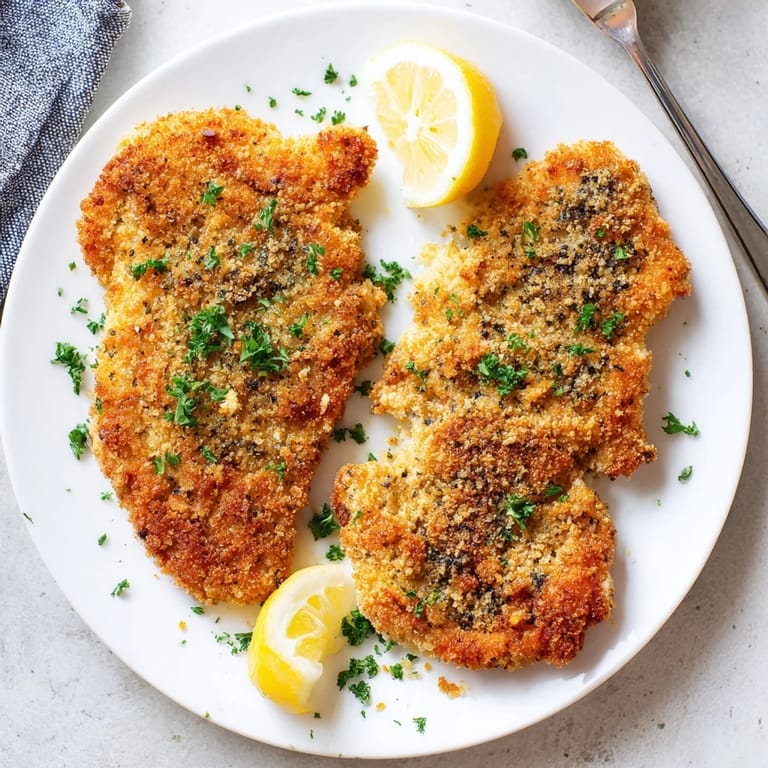
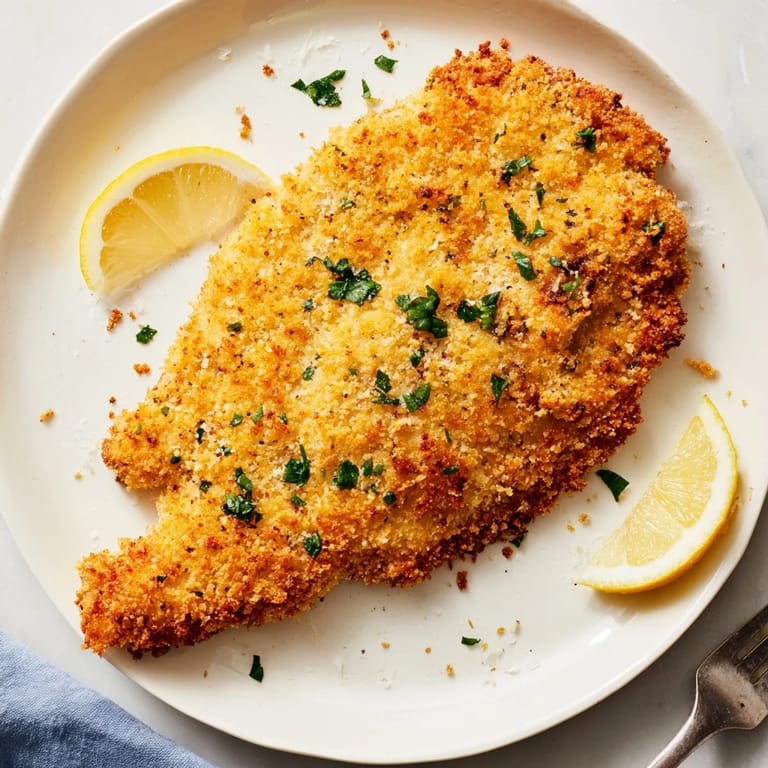
- After cooking, let the cutlets rest briefly on paper towels to drain excess oil. Sprinkle with a pinch of flaky salt while hot and serve with a generous squeeze of lemon that cuts through the richness perfectly.
 Save
Save A few years back during a power outage, I had just finished frying the last cutlet when everything went dark. My friends and I ate by candlelight, the chicken still warm, passing lemon wedges and stories around the table. Someone started humming, another joined in, and soon we were singing while sharing this simple meal. Whenever I make these cutlets now, I think of how food becomes more than sustenance when circumstances strip away distractions.
The Art of the Perfect Pound
The way you pound chicken for this recipe matters more than you might think. I once rushed through this step, leaving the breasts uneven - thicker in the middle, paper-thin at the edges. The result was predictably disappointing: overcooked edges and an undercooked center. Now I work methodically, starting at the center and moving outward in a circular pattern, checking thickness frequently. The goal isn't just thinness but uniformity, allowing the cutlet to cook evenly and remain juicy throughout.
Pairing Suggestions
These crispy cutlets have become my blank canvas for seasonal eating. In summer, I top them with a bright tomato-basil salad that wilts slightly against the hot chicken. Fall brings a topping of sautéed mushrooms with thyme, while winter meals might include a side of creamy polenta. Spring is perhaps my favorite, when tender greens tossed with a light lemon vinaigrette create the perfect counterpoint to the rich, golden crust. The versatility of this dish means it never feels repetitive, even when it appears on our table twice in a month.
Storage and Reheating
After one particularly ambitious dinner party, I found myself with four leftover cutlets and learned valuable lessons about preserving their texture. Refrigerated in a single layer with parchment between each piece, they maintain their integrity better than when stacked directly. The microwave is absolutely forbidden for reheating - it creates a sad, soggy shadow of the original glory.
- Always reheat in a 350°F oven for about 10 minutes to revive the crispy exterior while keeping the interior moist.
- For a delicious transformation, slice cold leftover cutlets and layer them on crusty bread with arugula and a smear of pesto for a lunch that makes coworkers envious.
- If freezing, do so before cooking - breaded raw cutlets freeze beautifully for up to a month and can be cooked directly from frozen by adding a few extra minutes to the cooking time.
 Save
Save This humble chicken cutlet recipe reminds us that cooking doesn't always need to be complicated to be deeply satisfying. When the golden crust shatters beneath your fork and the first bite combines crispy exterior with tender chicken, you're experiencing one of life's perfect culinary moments.
Recipe FAQs
- → How thin should I pound the chicken breasts?
Pound each chicken breast to approximately 1/2 inch (1.25 cm) thickness. This ensures even cooking and a tender, juicy result with maximum crispy surface area.
- → Can I use regular breadcrumbs instead of panko?
While panko breadcrumbs create superior crispiness due to their larger, airier texture, regular breadcrumbs can be substituted. The coating will be slightly less crunchy but still delicious.
- → What oil works best for frying these cutlets?
Olive oil provides authentic Italian-American flavor, but vegetable, canola, or avocado oil work equally well. Choose oils with high smoke points for best frying results at medium-high heat.
- → How do I know when the chicken is fully cooked?
The cutlets should be golden brown on both sides and reach an internal temperature of 74°C (165°F). They typically cook in 3-4 minutes per side when pounded to proper thickness.
- → Can these cutlets be made ahead of time?
Yes, bread the cutlets up to 4 hours ahead and refrigerate. For leftovers, reheat in a 180°C (350°F) oven for 10 minutes to restore crispiness rather than microwaving.
- → What are the best side dishes to serve with this?
Pair with fresh arugula salad, pasta with marinara, roasted vegetables, garlic mashed potatoes, or sautéed green beans. The bright acidity of lemon wedges complements the rich coating perfectly.