 Save
Save My friend Sarah called me mid-October in a panic—she'd volunteered to bring Halloween treats to her daughter's school party and had exactly two days to pull it off. When I suggested vampire bite cookies, her voice shifted from stressed to delighted. What started as a desperate solution became the most fun I'd had decorating cookies in years, watching her daughter giggle at the fake blood dripping down the sides like we'd just created tiny, edible horror movie props.
I'll never forget watching Sarah's daughter press a straw into warm cookies while her Halloween playlist blared in the background, completely absorbed in creating tiny vampire victims. Her concentration was serious, her tongue poking out slightly as she positioned each bite mark with the precision of a surgeon. By the time we piped the red icing, she was cackling like she'd just pulled off the world's most delicious prank, and honestly, she had.
Ingredients
- All-purpose flour (2 1/4 cups): This is your cookie's foundation—measure it by spooning into your cup and leveling off, not scooping, which packs it down and makes cookies dense.
- Unsalted butter (3/4 cup, softened): Room temperature butter creams with sugar faster and creates that light, tender crumb that makes these cookies worth eating even without the blood effect.
- Granulated sugar (1 cup): The sweetness here is balanced so the cookies don't taste medicinal—they're buttery first, sweet second.
- Baking powder (1/2 tsp): Just enough to give the cookies a delicate rise without making them cakey or crumbly.
- Egg (1 large) and vanilla extract (1 1/2 tsp): These bind everything together and add richness; don't skip the vanilla or your cookies will taste flat.
- Salt (1/4 tsp): A pinch that most people won't taste but will definitely notice if it's missing—it brightens all the other flavors.
- Powdered sugar (1 cup, sifted) and milk (2–3 tsp): This creates your blood icing, and sifting the powdered sugar prevents lumps that'll clog your piping bag.
- Light corn syrup (1/2 tsp): A small amount gives the icing a glossy, almost wet-looking finish that makes the fake blood look genuinely creepy.
- Red gel food coloring: Gel holds its color better than liquid and won't thin out your icing, which matters when you want that thick, drippy consistency.
Tired of Takeout? 🥡
Get 10 meals you can make faster than delivery arrives. Seriously.
One email. No spam. Unsubscribe anytime.
Instructions
- Prepare your workspace:
- Preheat your oven to 350°F and line two baking sheets with parchment paper—this prevents sticking and makes cleanup laughably easy. If your kitchen is warm or humid, chill your dough for 30 minutes after mixing; it'll be way less sticky to handle.
- Mix your dry ingredients:
- Whisk flour, baking powder, and salt in a medium bowl and set it aside. This pre-mixing distributes the leavening evenly so you don't get weird texture variations between cookies.
- Cream butter and sugar:
- Beat softened butter and granulated sugar together for about 2 minutes until the mixture looks pale and fluffy, almost like frosting. This step incorporates air into the dough, which creates a tender texture.
- Add wet ingredients:
- Beat in your egg and vanilla extract until everything is combined and smooth. Don't worry if it looks slightly separated at first—it'll come together.
- Combine wet and dry:
- Add your flour mixture slowly on low speed, mixing just until a soft dough forms. Stop as soon as you don't see streaks of flour; overmixing makes tough cookies.
- Shape and bake:
- Scoop tablespoon-sized portions, roll them into balls, and place them 2 inches apart on your prepared sheets. Flatten each one slightly with your palm—they'll spread a bit more as they bake. Bake for 10–12 minutes until the edges turn just golden; the centers will still look slightly underdone, which is perfect because they'll firm up as they cool.
- Cool properly:
- Let cookies sit on the baking sheet for 5 minutes so they set slightly, then transfer them to a wire rack to cool completely. This prevents them from breaking apart when you poke the bite marks.
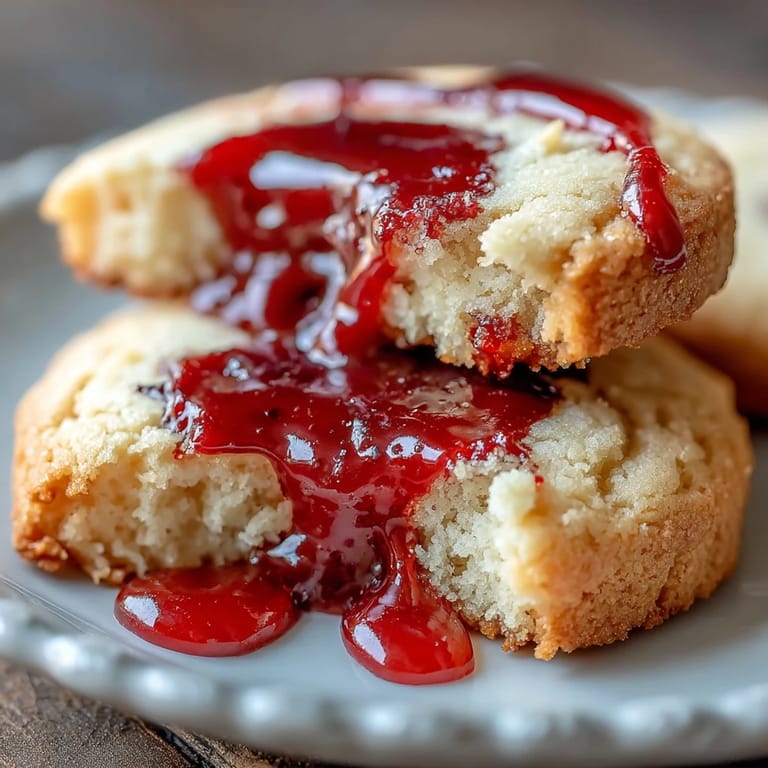
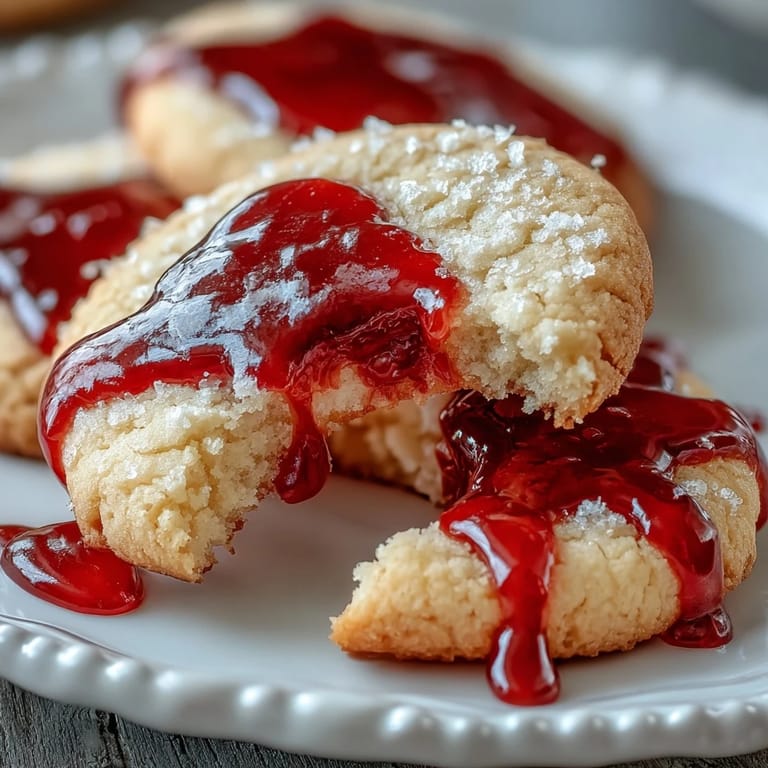
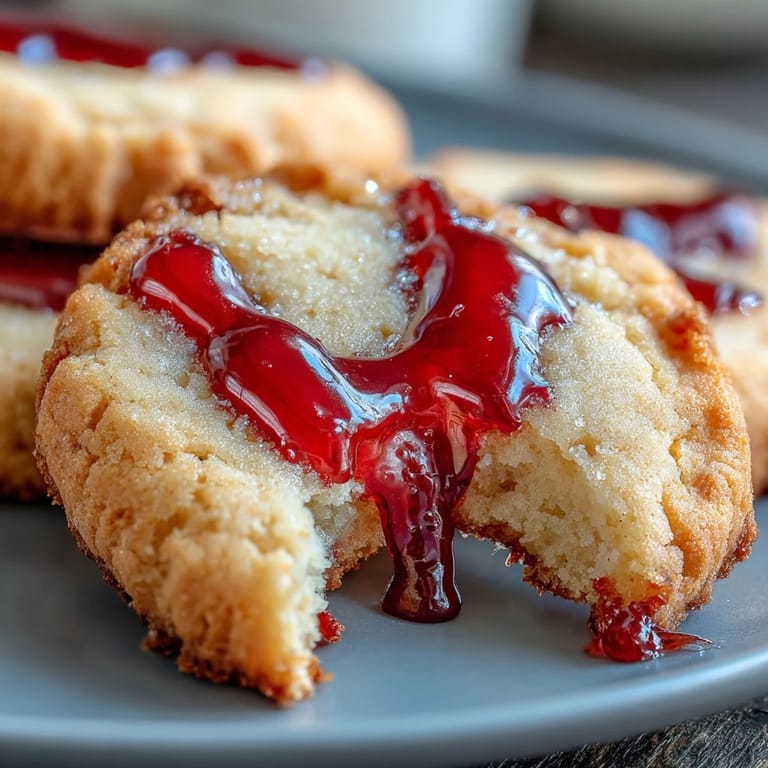
- Create the bite marks:
- Once cookies are completely cool, use a straw or the blunt end of a chopstick to gently poke two holes near the edge of each cookie, angling them slightly downward to mimic fang marks. Press gently rather than stabbing—you want defined marks, not crumbles.
- Make your blood icing:
- Sift your powdered sugar into a small bowl, then add milk one teaspoon at a time, stirring constantly, until you reach a thick but pipeable consistency. Add corn syrup and red gel coloring, stirring until the color is evenly distributed and deeply red.
- Decorate with blood:
- Using a toothpick or small piping bag fitted with a fine tip, fill the bite mark holes with red icing, letting it drip down the cookie's side for a gruesome effect. You can also pipe a thin trail of icing from the marks for extra drama.
- Add finishing details:
- If you're feeling extra, use black or dark red gel icing to add pupils or shadowing around the bite marks. Let everything set for at least 15 minutes before serving or packaging.
 Save
Save What struck me most wasn't the finished cookies or even how good they tasted—it was the moment when Sarah's entire family gathered around to see the final result, and her young son declared them too beautiful to eat. They ate them anyway, of course, but that brief hesitation said everything about how much fun a simple cookie could be.
Why These Cookies Work for Halloween
Sugar cookies are the perfect canvas for creativity because their buttery, not-too-sweet flavor doesn't compete with your decorations. The soft crumb also means kids can bite through them easily, unlike shortbread or those rock-hard decorated cookies that sit in the back of the pantry for months. Plus, there's something darkly funny about something so delicious looking so deliberately gruesome—it's the cognitive dissonance that makes Halloween treats memorable.
Storage and Make-Ahead Tips
Bake the cookies up to three days ahead and store them in an airtight container at room temperature—they actually stay softer this way than if you leave them on the counter exposed to air. The icing can be made the morning of serving, and undecorated cookies can be frozen for up to a month if you want to get ahead. If you're bringing these to a party, decorate them no more than four hours before serving so the icing doesn't dry completely, which actually looks less realistic anyway.
Variations and Flavor Ideas
Once you've mastered the basic version, these cookies are begging for experimentation. Add almond extract for a subtle nuttiness, or swap vanilla for lemon extract for brightness. You could even tint the dough itself a pale green or gray for zombie cookies, or use dark red or black icing instead of bright red for a more sinister vibe.
- Pair these with hot chocolate for a cozy Halloween night, or serve them at a party with punch and watch people's reactions when they realize how good they taste.
- If you're making a full Halloween spread, these cookies steal the show compared to store-bought options because they taste homemade (because they are).
- Let kids help with the decorating—it's messy, fun, and they'll actually eat the cookies instead of abandoning them halfway through.
 Save
Save These cookies proved to me that sometimes the best recipes aren't complicated—they're just willing to play along with your vision. Making Sarah's daughter laugh while decorating cookies was worth more than any perfectly plated dessert.
Recipe FAQs
- → What gives the cookies their soft texture?
The softness comes from the combination of butter and granulated sugar creamed together, along with the proper balance of flour and baking powder.
- → How is the red icing made shiny and thick?
Adding light corn syrup to the powdered sugar and milk mixture creates a glossy, pipeable consistency perfect for detailed decoration.
- → How do you create the bite mark effect?
Using a straw or chopstick end, gently press two indentations on cooled cookies before filling them with red icing to mimic bite marks.
- → Can the dough be chilled before baking?
Yes, chilling the dough for 30 minutes helps with handling and prevents spreading during baking.
- → Are these cookies suitable for special diets?
They are vegetarian-friendly but contain gluten, egg, and dairy, so they may not fit gluten-free or vegan requirements without modification.
- → What optional flavors can enhance the cookies?
Adding a small amount of almond extract can complement the vanilla and add a subtle nutty note.