 Save
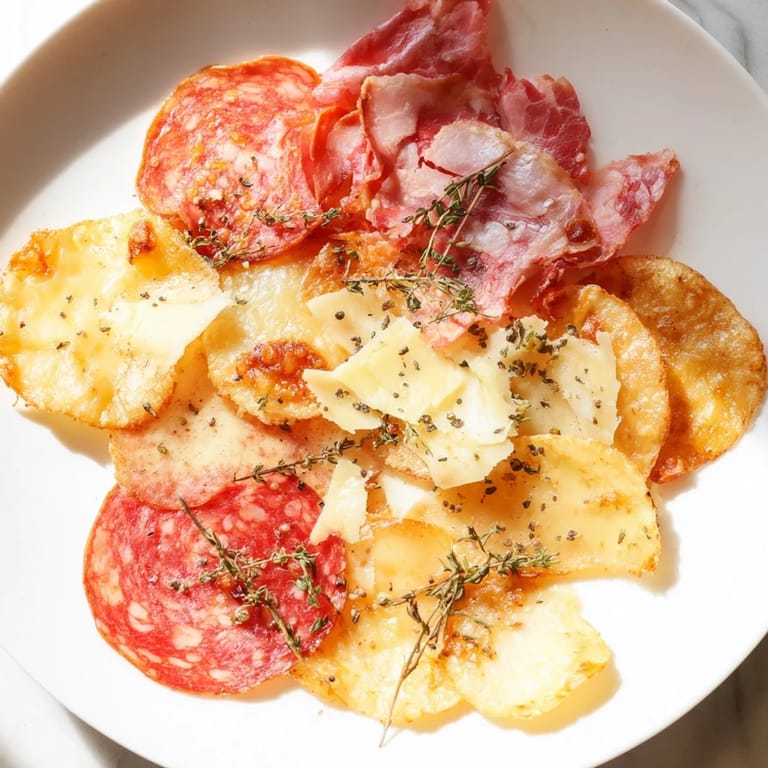
Save I discovered charcuterie chips by accident on a lazy Sunday when I was cleaning out my charcuterie board from the night before. A few slices of salami and aged cheddar had fallen onto a baking sheet, and instead of tossing them, I popped the sheet in the oven while tidying up. Ten minutes later, the kitchen smelled like a gourmet deli, and I pulled out these impossibly crispy, golden shards that tasted like concentrated versions of their former selves. My partner heard the oven beep from the other room and came wandering in to investigate, and suddenly we were both standing there, hands hovering over a cooling sheet like we'd just discovered something precious. That's when I realized: the simplest ingredients, treated with a little heat and attention, could become something completely crave-worthy.
The first time I brought a platter of these to a dinner party, I almost didn't want to set them down. My friend Sarah reached for one before I'd even made it past the doorway, and she closed her eyes like she was experiencing something transcendent. Within five minutes, half the platter was gone, and people were asking if this was a real recipe or something I'd invented just to show off. That's the moment I knew these chips weren't just a happy accident anymore—they'd become the thing people remembered about the meal.
Ingredients
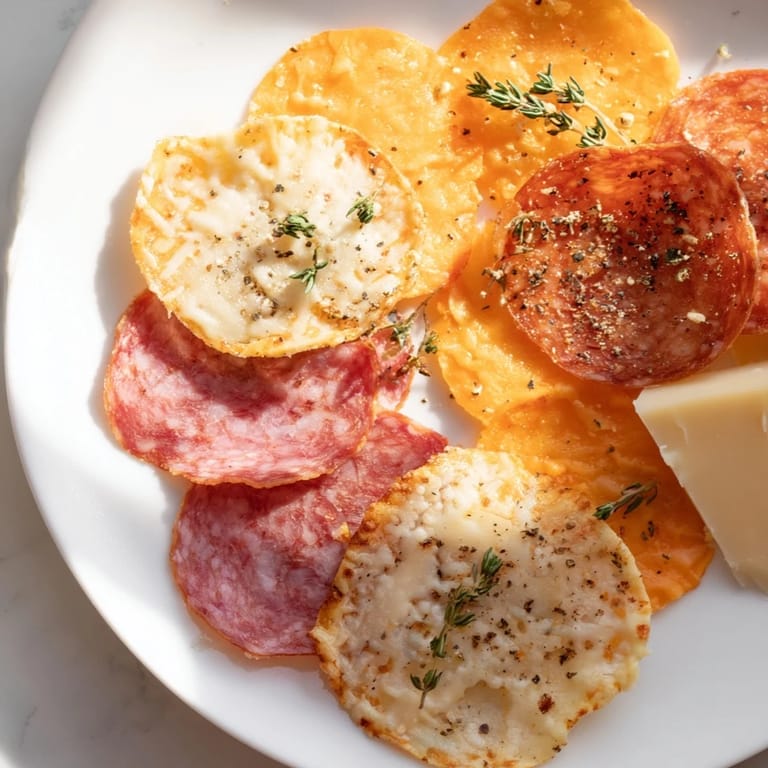
- Salami (100g, thinly sliced): The paprika and garlic in good quality salami turn nutty and almost caramelized when crisped—this is where half the flavor comes from, so don't skimp on the slicing thickness.
- Prosciutto (100g, thinly sliced): Its delicate salt and subtle sweetness become the backbone of your chip platter, and it crisps faster than other meats because it's so thin.
- Pepperoni (100g, thinly sliced): This one gets a little bit of char that's absolutely irresistible, and the grease that renders out is actually your secret to that audible crunch.
- Aged Cheddar or Manchego (100g, sliced): Hard cheeses are your best friend here because they melt just enough to get golden and bubbling without turning into a puddle—the sharpness intensifies in the heat.
- Semi-hard Cheese like Gouda or Provolone (100g, sliced): These create a slightly creamy center as they bake while still holding their shape, adding a whole different texture to your platter.
- Fresh Herbs & Cracked Black Pepper (optional): Thyme or rosemary become fragrant and almost crispy themselves when baked on the cheese, and they make everything look intentional and elegant.
Tired of Takeout? 🥡
Get 10 meals you can make faster than delivery arrives. Seriously.
One email. No spam. Unsubscribe anytime.
Instructions
- Get Your Oven Ready and Set Up for Success:
- Heat your oven to 375°F and line two baking sheets with parchment paper. This temperature is the sweet spot where everything crisps without burning, and parchment keeps you from any sticking drama.
- Arrange the Cured Meats:
- Lay your salami, prosciutto, and pepperoni slices flat on the first baking sheet in a single layer, making sure they're not overlapping or touching. Think of them like they're sunbathing and each one needs its own space to crisp evenly.
- Arrange the Cheeses:
- Spread your cheese slices across the second baking sheet with a little space between each one, about half an inch. This is important because they'll bubble and release moisture, and you want air to circulate.
- Season If You're Feeling Fancy:
- If you're using herbs or black pepper, sprinkle them over the cheese now—they'll toast right into the surface and smell incredible. Don't be shy with the seasoning since flavors concentrate in the heat.
- Bake the Meat Chips:
- Pop the meat sheet in the oven for 8 to 10 minutes, watching for the edges to turn crisp and golden-brown. You'll smell when they're almost ready—that's your cue to check them.
- Bake the Cheese Chips:
- The cheese needs less time, just 6 to 8 minutes, until it's melted, golden, and bubbling at the edges. It's tempting to leave them longer, but cheese can go from perfect to bitter fast, so set a timer.
- Cool and Crisp Up:
- Remove both sheets and let everything cool completely on the pans—this is crucial because they'll continue crisping as they cool and become even more audibly crispy. The meat chips are done immediately, but give the cheese about 5 minutes before gently lifting them off with a spatula.
- Arrange and Serve:
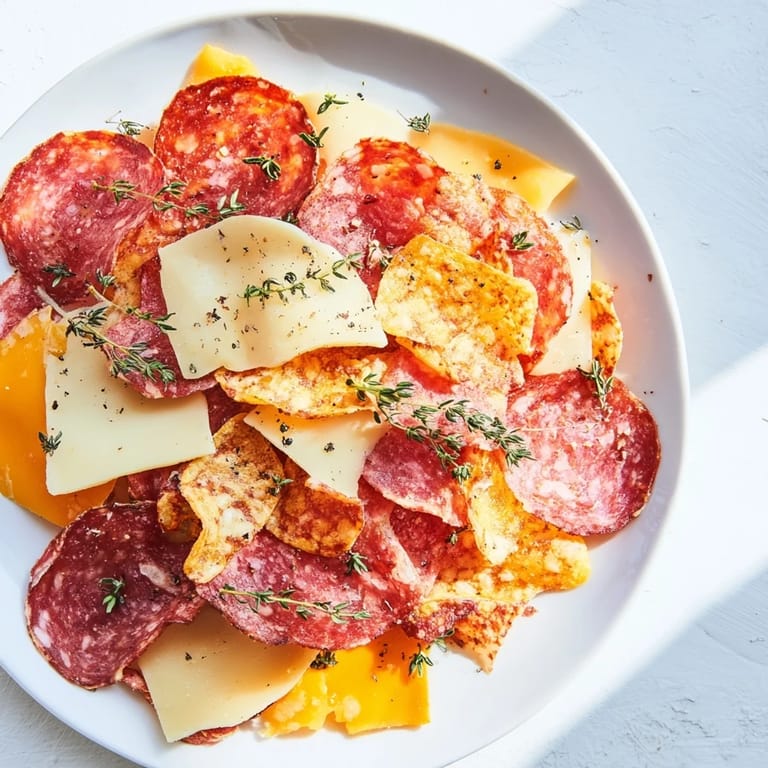
- Once everything is cooled, arrange your charcuterie chips on a platter in whatever arrangement makes you happy. Serve them while they're still at their crispiest, and watch people lose their minds.
 Save
Save There was an afternoon when my mom came over just as I was pulling a batch out of the oven, and the kitchen filled with this smell that made her actually pause and breathe it in. She sat at the counter eating them straight off the cooling sheet, no judgment, no pretense—just genuine delight. Watching her rediscover that simple pleasure of good ingredients transformed by heat reminded me that food doesn't have to be complicated to be memorable.
Why These Work as a Party Move
The beautiful thing about charcuterie chips is that they're impressive without any of the effort of actual entertaining. You're not standing over a hot stove, you're not juggling timing, and by the time your guests arrive, everything is done and cooling peacefully on your counter. People see them on a platter and assume you've gone to great lengths, but honestly, you've just applied some clever heat to things that were already delicious. It's the kind of move that builds a reputation without you having to lift a finger once people are in the door.
The Science of the Sizzle
When you bake these, a few magical things happen at once. The water content in the meats evaporates and the fats render out, leaving behind pure, concentrated flavor and that audible crispness that makes your teeth happy. The cheese goes through a similar transformation—the moisture burns off while the proteins and fats get just hot enough to brown slightly without going bitter, creating those little golden bubbles that everyone fights over. Once everything cools, it all sets into this shatteringly crisp texture that's impossible to achieve any other way.
Making Them Your Own
The base recipe is solid, but this is also the kind of thing that rewards a little experimentation. I've added smoked paprika to the cheese before baking, tried different herbs depending on what I had in the garden, and once even added a tiny pinch of cayenne to the harder cheeses for people who like heat. You could easily swap out the specific meats and cheeses for whatever you have in your fridge—the technique works with almost any combination, so don't feel locked into these exact varieties.
- Smoked meats create an extra layer of complexity that's worth seeking out if you can find them.
- Fresh herb stems can go straight in the oven too and become these crispy, flavorful little bits.
- These pair beautifully with a light red wine, or honestly, just with the satisfaction of having made something this good so easily.
 Save
Save These chips have a way of turning a regular afternoon into something special, which honestly is the whole point of having good ingredients and knowing how to treat them right. Keep a platter of these around and you'll be the person everyone wants to visit.
Recipe FAQs
- → What types of meats work best for these chips?
Thinly sliced cured meats like salami, prosciutto, and pepperoni are ideal due to their texture and fat content which crisps nicely in the oven.
- → How can I prevent cheese from sticking while baking?
Using parchment paper and spacing the cheese slices apart ensures they don’t stick during baking and can be removed easily once crisp.
- → Are these chips suitable for low-carb diets?
Yes, they are low in carbohydrates since they consist mainly of cured meats and cheeses, making them perfect for low-carb snacking.
- → Can I add seasoning for extra flavor?
Sprinkling fresh herbs such as thyme or rosemary and cracked black pepper before baking enhances aroma and taste without overpowering the base flavors.
- → How should leftovers be stored?
Keep leftover chips in an airtight container at room temperature for up to two days to maintain their crispness and flavor.