 Save
Save Strawberry season has a way of sneaking up on me, usually when I catch that distinctly sun-warmed, tangy-sweet scent drifting from the fruit stall on a bustling Saturday morning. Last spring, a friend dropped by unexpectedly with a basket of freshly picked strawberries, their red color almost impossible to resist. There was no plan at all, just the hum of conversation and the sound of stems snapping as we hulled a mountain of berries. Jam-making wasn't on my agenda that day, but the laughter and momentum carried us straight into a sugar-dusted kitchen adventure. The next morning, nothing felt more charmed than slathering that homemade jam on toast, the memory of that impromptu afternoon lingering in every bite.
One breezy afternoon, I made this jam with my niece as we sang along to an old radio while strawberries simmered gently on the stove. We took turns mashing berries, sneaking sweet bites, and I was reminded how just a bit of jam can stitch together generations around the same sticky spoon.
Ingredients
- Fresh strawberries (500 g): Choose berries with glossy skin and a fragrant aroma—they give richer color and flavor; don't worry if some are slightly overripe, they'll add sweetness.
- Granulated sugar (250 g): The sugar helps set the jam and preserves the fruit—I've found giving it a quick stir with the berries keeps the texture lively.
- Freshly squeezed lemon juice (2 tbsp): Adds brightness and helps the jam thicken naturally; always strain the juice to avoid seeds and pulp.
- Vanilla bean, split and scraped (optional, or 1 tsp vanilla extract): Vanilla gives the jam depth, but don't stress if you skip it; I've used both, and each batch is a little different but always delightful.
Tired of Takeout? 🥡
Get 10 meals you can make faster than delivery arrives. Seriously.
One email. No spam. Unsubscribe anytime.
Instructions
- Prep your berries:
- Hull and halve your strawberries, feeling for their plumpness and breathing in that fresh aroma; it's half the fun to mash about half the berries gently, leaving a mix of pieces for that just-right texture.
- Mix and marinate:
- Sprinkle sugar and lemon juice over the berries in your saucepan, then let them rest together for 10 minutes; you’ll notice the colors deepen and juices gather at the bottom.
- Add vanilla magic:
- If you’re after an extra layer of flavor, now’s the time for those vanilla seeds and the pod to join the party.
- Simmer and stir:
- Bring everything to a gentle boil over medium heat, stirring regularly and skimming off any foam as you catch the faint scent of caramelizing berries.
- Test for doneness:
- Keep stirring, checking for thickness, and use a candy thermometer or the chilled plate trick; when the jam wrinkles as you nudge it, you've struck gold.
- Jar the jam:
- Discard the vanilla pod, let the jam rest a few minutes, then ladle it carefully into sterilized jars while it’s still warm—it's a satisfying, fragrant finale.
- Cool and store:
- Let the sealed jars cool fully at room temperature, then pop them in the fridge, eager anticipation entirely appropriate for the week ahead.
 Save
Save The first time my roommates and I opened a jar of this jam, the kitchen filled with a scent so vivid it actually silenced our morning chatter for a moment. In that pause, I realized homemade jam had quietly become our shared comfort on long days, tucked between slices of bread and tea mugs.
Sterilizing Jars Without Fuss
Instead of fussy boiling water baths, I usually wash the jars in hot soapy water, rinse well, then pop them upside down in a warm oven at 120°C. They’re ready to fill as soon as the jam is done—no damp spots or steam to worry about.
Choosing the Best Strawberries
I've found that smaller, sun-ripened strawberries do wonders compared to the larger, watery supermarket kind. If you're lucky to find berries at peak season, don't hesitate to toss in a handful of just-overripe ones for boosted flavor and sweetness.
Decorating and Gifting Jars
One of my favorite parts is tying fabric scraps and twine around the lids, which always feels like bottling up a bit of old-fashioned charm for the lucky receiver.
- Scribble the date on a tiny paper label.
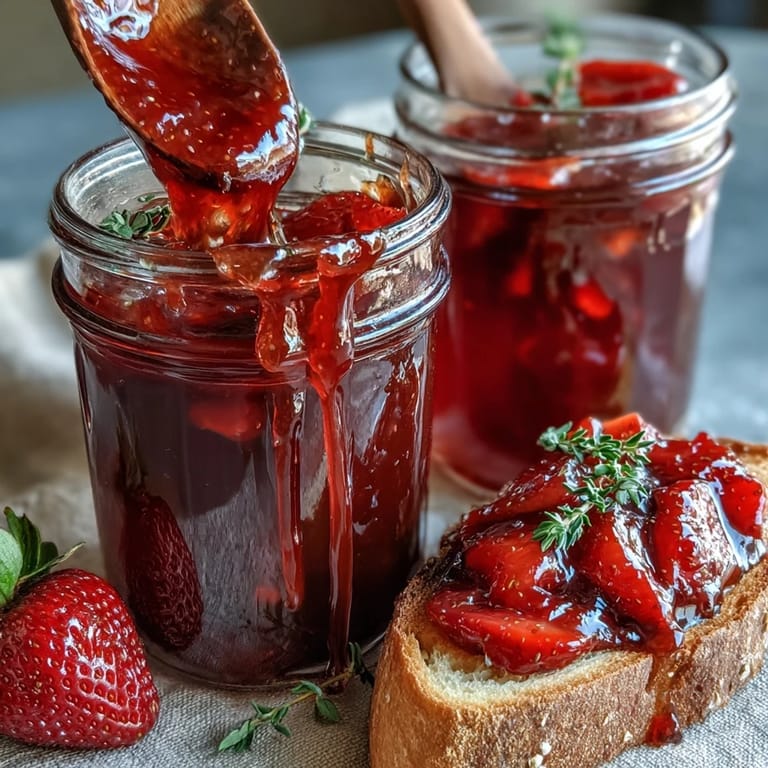
- Include a sprig of thyme or a cinnamon stick for a special touch.
- Remind friends to refrigerate after opening for freshness.
 Save
Save This strawberry jam is more than a preserve—it's an afternoon distilled. Whether you eat it on toast or with a spoon, it's little moments like these that sweeten the everyday.
Recipe FAQs
- → How do I know when the jam is thick enough?
Look for the mixture to reach about 105°C (220°F) on a candy thermometer or perform the chilled-plate test: spoon a little onto a chilled plate, let it cool, then push with your finger—if it wrinkles, it's ready.
- → Can I reduce the sugar without ruining the texture?
Reducing sugar will affect set and shelf life. For a less sweet spread, reduce sugar slightly and cook a bit longer to concentrate fruit solids, or add commercial pectin designed for low-sugar preserves to help thicken.
- → Is the vanilla bean necessary?
Vanilla adds warm aromatic depth but is optional. Vanilla extract works as a substitute; add it near the end of cooking. If you use a bean, remove the pod before jarring for a smoother final product.
- → What’s the best way to sterilize jars?
Wash jars and lids in hot, soapy water, then simmer in a pot of boiling water for 10 minutes or place jars in a 120°C oven for 10–15 minutes. Fill jars hot to help seal and avoid temperature shock.
- → How can I add herbal notes like thyme or basil?
Add a few sprigs of fresh thyme or basil during the simmering stage to infuse subtle herbal tones. Remove the sprigs before jarring to keep the texture clear, or finely chop herbs and add sparingly for a rustic look.
- → How should I store and how long will it keep?
Store sealed jars in the refrigerator and consume within one month. For longer pantry storage, process sealed jars in a boiling water bath for 10 minutes and store in a cool, dark place; always check seals before use.