 Save
Save My sister texted me a photo of robin eggs she'd found in her garden, and suddenly I was standing in my kitchen at midnight, convinced I could recreate that exact shade of blue in chocolate form. The result was these delicate cake pops—part edible art project, part genuine dessert—that somehow became the thing everyone asks for when spring rolls around. There's something magical about turning cake crumbs and frosting into perfectly spherical bites that catch the light just right, especially when you nail that robin's egg blue color on the first try (which, admittedly, took me three attempts).
I brought these to an Easter brunch last year and watched my friend's eight-year-old go completely silent—not the good kind of quiet, but the focused, analytical kind where she was clearly trying to figure out if they were real eggs. When she realized they were cake, her whole face transformed, and suddenly three adults were gathered around asking for the recipe. That moment of delighted surprise, that's when I knew these weren't just pretty desserts; they were tiny vehicles for joy.
Ingredients
- 1 box vanilla cake mix (or homemade equivalent): The foundation here—use quality mix or homemade because you're about to turn it into crumbs, and sad cake makes sad pops.
- 1/2 cup unsalted butter, softened: Room temperature is non-negotiable; cold butter won't cream properly and your frosting will be grainy and disappointing.
- 1 1/2 cups powdered sugar: The binder that holds your cake crumbs together; sift it first to avoid lumps that won't incorporate smoothly.
- 2 tbsp milk: Adjust this amount based on humidity and cake moisture—you want a frosting that's creamy but not wet.
- 1 tsp vanilla extract: A real vanilla makes a noticeable difference when you're working with such simple ingredients.
- 12 oz white candy melts or white chocolate: Candy melts are more forgiving than chocolate, but quality matters either way; cheap melts can taste waxy.
- Blue gel food coloring: Oil-based is essential here—water-based coloring will cause your chocolate to seize and separate, a mistake I made once and won't repeat.
- 2 tbsp coconut oil or vegetable shortening: This is your escape hatch if your coating gets too thick; it thins things out without breaking the chocolate.
- 1 tbsp cocoa powder: The secret weapon for that speckled effect that makes them look professionally done.
- 1–2 tsp vodka or clear extract: Use vodka if you have it; clear extract works but vodka evaporates faster, leaving just the cocoa powder behind.
- 24 lollipop sticks and a Styrofoam block: The non-negotiable hardware—without these, you're just making chocolate-covered balls, which is fine but less fun.
Tired of Takeout? 🥡
Get 10 meals you can make faster than delivery arrives. Seriously.
One email. No spam. Unsubscribe anytime.
Instructions
- Bake your cake and let it cool completely:
- Follow the box instructions or your homemade recipe, but don't skip the cooling step—warm cake crumbs won't hold together properly when mixed with frosting. This is also the perfect time to pour yourself a coffee and mentally prepare for the next 90 minutes of focused assembly work.
- Make frosting that's silky smooth:
- Cream the softened butter for about a minute until it looks pale and fluffy, then add powdered sugar gradually while beating on medium speed. Once it comes together, add milk and vanilla and beat until you can drag a spatula through it and have it stay where you dragged it.
- Transform cake into the perfect moldable mixture:
- Crumble your cooled cake with your hands into a large bowl—aim for fine crumbs, almost like wet sand. Add frosting bit by bit, mixing with your hands until the mixture just barely holds together when squeezed; you're looking for a texture that's somewhere between play-dough and brownie batter.
- Roll and chill your cake balls:
- Form 24 roughly equal balls (a small ice cream scoop helps tremendously here) and arrange them on a parchment-lined baking sheet. Freeze them for at least 15 minutes—this is non-negotiable because cold centers won't crumble off your stick when you dip them.
- Prepare your robin's egg blue coating:
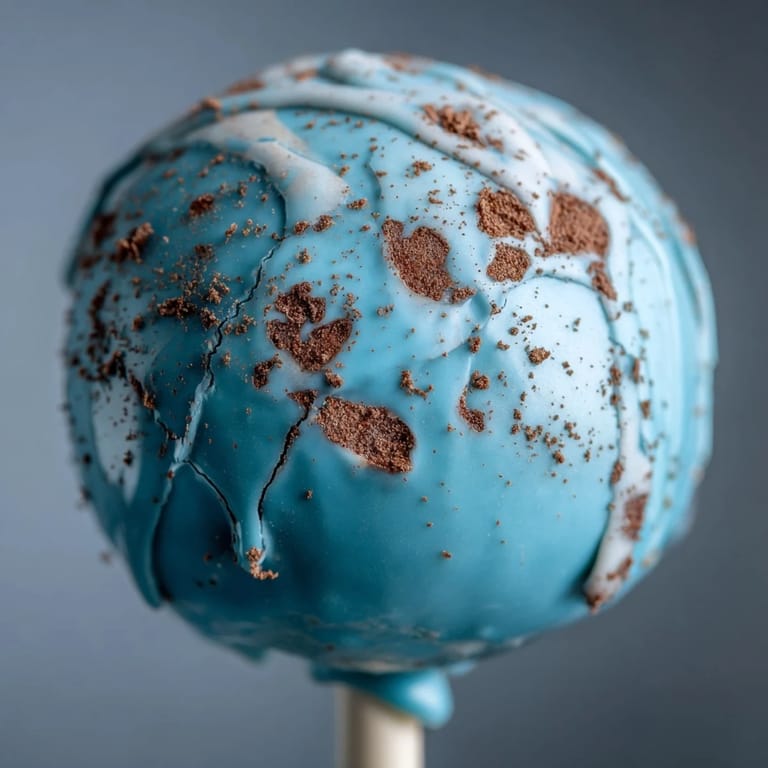
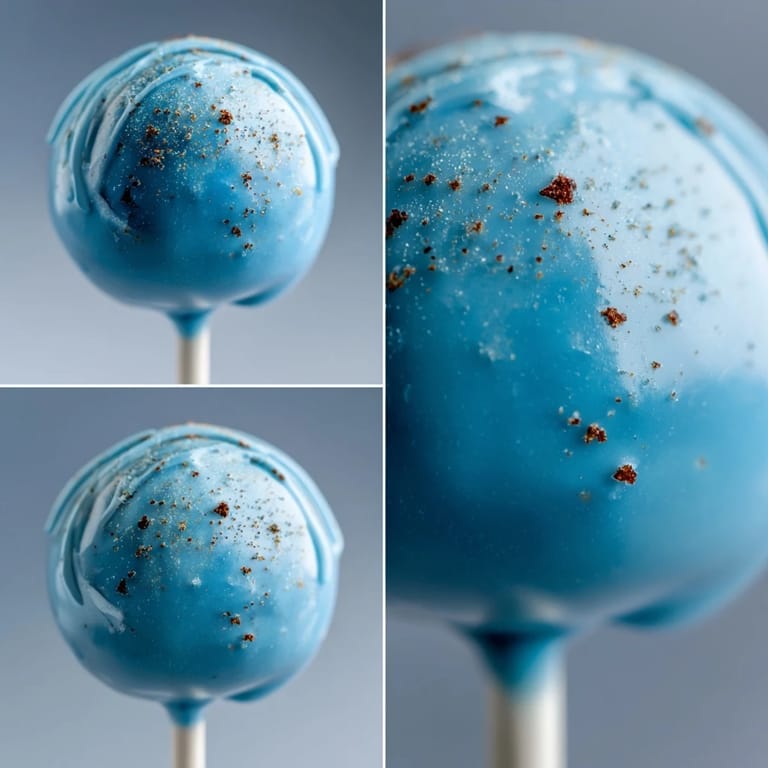
- Melt your candy melts gently in a heatproof bowl over simmering water, stirring constantly and working in 20-second intervals if using the microwave. Add blue gel coloring drop by drop until you hit that perfect soft robin's egg shade—it's lighter than you probably think it should be, with just a whisper of green in there.
- Insert sticks and set them secure:
- Dip each stick's tip into the melted coating, then press it halfway into a cake ball with a gentle twisting motion. Refrigerate all of them for 10 minutes so the coating hardens and holds the stick in place permanently.
- Coat each pop with precision:
- Working with one or two at a time, dip each cake pop fully into the blue coating and twirl it gently to let excess drip off. Stand it upright in your Styrofoam block immediately and let it set completely before moving to the next step.
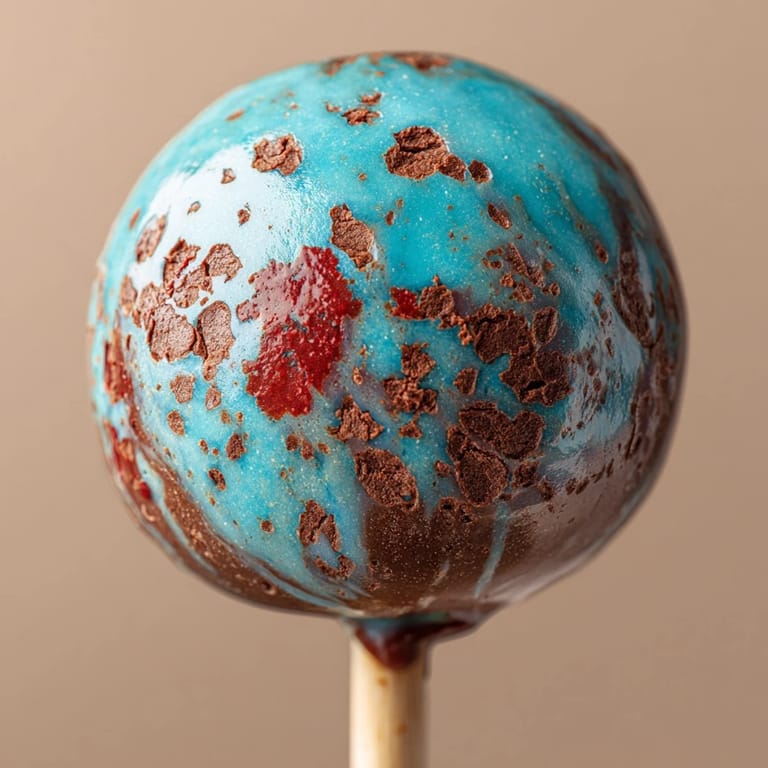
- Add the speckled detail that makes them sing:
- Mix cocoa powder with vodka or extract into a thin, paint-like paste, then dip a clean food-safe brush into it and flick your wrist toward the cake pops to create delicate specks. The motion is important here—aim for a gentle flick, not a heavy brush stroke.
- Let everything set completely:
- Give your finished pops at least two hours at room temperature before moving them around or packaging them, or refrigerate for 30 minutes if you're in a time crunch.
 Save
Save There's a moment during cake pop assembly when everything clicks—when you realize you've created something genuinely beautiful with your own hands, something that looks like it came from a fancy bakery but came from your kitchen instead. My neighbor tasted one of these and asked if I'd hired a pastry chef; that feeling of pulling off something that looks harder than it actually is—that's why I keep making them.
The Freezer Is Your Best Friend
The most underrated step in this entire recipe is freezing your cake balls before dipping them. I learned this the hard way when I tried to rush through the process and ended up with a baking sheet full of half-melted pops and coating splattered everywhere. Frozen cake balls are firm enough to survive the dip without absorbing too much chocolate, and they maintain their shape like little edible sculptures. If you're planning ahead, you can actually make the cake balls up to three days in advance, freeze them in an airtight container, and only commit to the chocolate coating when you're ready to finish them off.
Color Mixing Is Half the Magic
The robin's egg blue color is deceptively tricky because most people want to make it darker and more vibrant than it should be. Real robin eggs are soft, almost muted, with a subtle green undertone that comes from just a few drops of blue coloring. I recommend starting with maybe three drops of blue in your melted white chocolate and tasting (no, not actually tasting—looking) as you go. You can always add more color, but you can't take it out, and there's nothing sadder than white chocolate that's turned a shade of blue that looks like a swimming pool instead of nature.
Storage and Variations Worth Trying
These cake pops are surprisingly sturdy and can handle being made a day or two ahead of time, which makes them perfect for planning purposes. At room temperature they'll last about three days, though they taste best within the first two days when the contrast between the crispy coating and the soft cake inside is most pronounced. If you want to play with flavor, try adding almond extract or a splash of lemon juice to the frosting—I've made a whole Easter progression where some are vanilla, some are lemon, and some have a hint of almond, and honestly the variety keeps things interesting.
- Store finished pops in an airtight container at room temperature or refrigerate them to extend their shelf life to about a week.
- If your coating cracks during dipping, you can dip again to seal the cracks, or embrace the rustic look and add more speckling to cover imperfections.
- Save any leftover melted chocolate in a jar in the fridge and gently reheat it when you need to do a second coat or touch-up work.
 Save
Save These robin's egg blue cake pops have become my go-to spring dessert, the thing I make when I want to feel accomplished without actually spending hours in the kitchen. Every time someone bites into one and their face lights up, I remember why I love cooking—it's not really about the dessert, it's about that moment of delight.
Recipe FAQs
- → What gives the coating the robins egg blue color?
Blue gel food coloring, preferably oil-based, is added to melted white chocolate or candy melts to achieve the signature robins egg blue shade.
- → How is the speckled effect created on the pops?
A mixture of cocoa powder and vodka or clear extract is applied with a brush to flick gentle speckles onto the coated pops for a festive look.
- → Can these treats be made gluten-free?
Yes, by using a certified gluten-free cake mix and ensuring all ingredients are gluten-free, these can be adapted to gluten-free needs.
- → How should the pops be stored after preparation?
They can be stored at room temperature for up to three days or refrigerated for up to a week to maintain freshness.
- → What is the best way to prevent chocolate from seizing during melting?
Using oil-based food coloring helps prevent chocolate from seizing when adding color to melted white chocolate.
- → Are there flavor variations recommended for the frosting?
Adding lemon or almond extract to the frosting can introduce a pleasant twist to the classic vanilla flavor.